Why CBCT plus digital workflows matter more than ever (and why assistants are central to it)
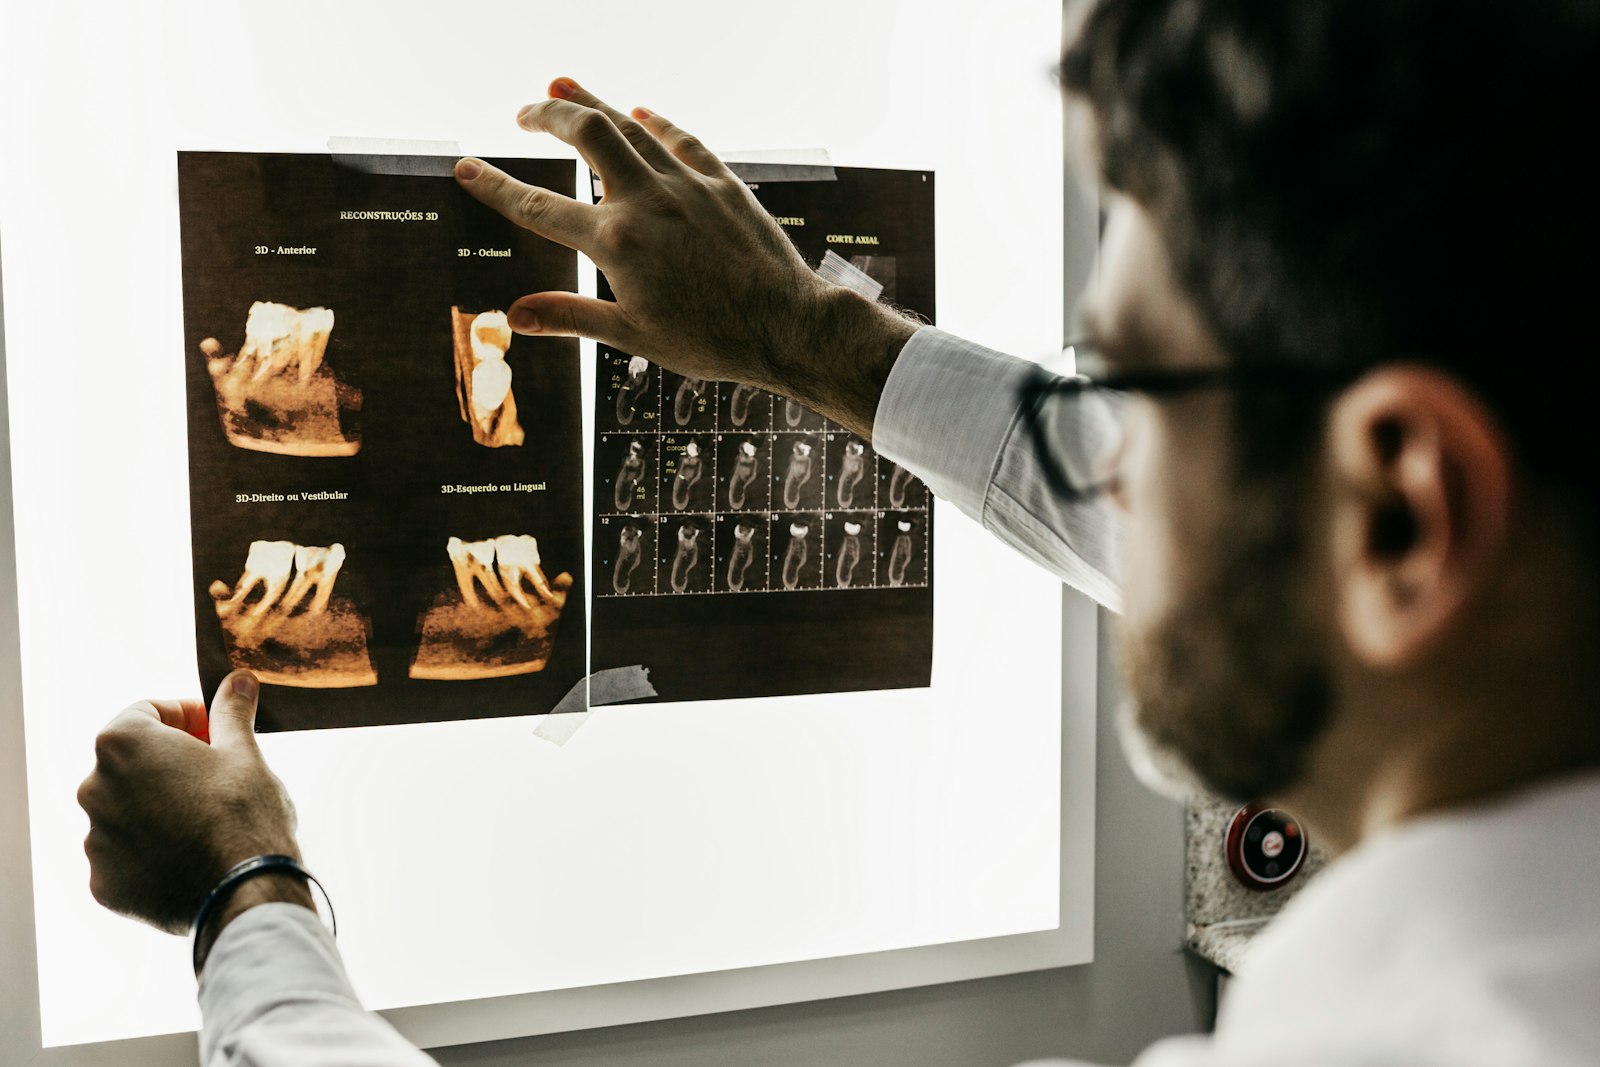
Cone Beam Computed Tomography, or CBCT, is a 3D dental scan that helps the dentist see anatomy in a way a traditional 2D X-ray cannot. Instead of a flat picture, CBCT produces a volume of data that can be reviewed as slices, views, and reconstructions.
In modern dentistry, CBCT commonly supports:
- Implant planning (bone volume, proximity to nerves and sinuses, restorative-driven planning)
- Endodontic assessment (missed canals, resorption, fractures, complex anatomy)
- Oral surgery and extractions (impactions, third molars, proximity to critical structures)
- Trauma and pathology evaluation (when the provider needs more detail than 2D offers)
- Airway or TMJ screening when the practice and provider use CBCT for those indications
What has changed in many practices is that the assistant’s role is no longer just “taking images.” It is supporting a digital diagnosis workflow that looks more like:
Capture → Verify → Document → Communicate
When the assistant follows a consistent workflow, the practice typically sees fewer retakes, tighter appointment flow, less chair time lost to troubleshooting, and a calmer patient experience. Patients usually do not remember the settings you chose, but they do remember whether they felt confident, guided, and comfortable.
This article walks you through a step-by-step dental assistant workflow for CBCT imaging support and digital documentation that aligns with safe, compliant practice operations.
In addition to oral surgery, CBCT also plays an important role in other areas such as orthodontics and periodontics. For those interested in expanding their knowledge and skills in these areas or others related to dentistry, various courses offered by institutions like Broward Dental Academy could be beneficial.
Where CBCT fits in the patient journey: common scenarios assistants will see
In a busy practice, CBCT tends to show up in repeatable scenarios. Knowing the common triggers helps you anticipate timing, documentation, and what the provider will expect when they walk in.
Typical reasons include:
- Implant consultations and pre-op planning
- Impacted teeth (including third molars and canines)
- Trauma cases with suspected bony involvement
- Complex endodontics that needs 3D evaluation, such as those outlined in our endodontics program
- Pathology evaluation when 2D imaging is not enough
- Pre-surgical planning for extractions, grafting, or related procedures
A practical principle is “right scan, right time.” In many offices, the dentist prefers to start with 2D imaging (PA, bitewing, pano) and move to CBCT when the benefit outweighs additional exposure. In other situations, the provider may indicate CBCT upfront, especially for implant planning or high-risk extractions, to avoid delays and improve predictability.
This is where assistants keep the day moving. You are often coordinating between:
- The front desk (scheduling, insurance notes, referrals, scan timing)
- The clinical team (room flow, appointment readiness, re-care)
- The provider (reason for scan, protocol preference, urgency)
Communication touchpoints that prevent confusion later:
- Confirm the reason for the scan in simple terms
- Document symptoms and relevant history tied to imaging (pain location, swelling, trauma date, prior endo, previous surgery)
- Capture and relay patient concerns (anxiety, claustrophobia, pregnancy possibility, TMJ discomfort, limited opening)
It’s important to remember that each situation is unique and may require different approaches or even specific certifications for handling certain cases. Additionally, being aware of different locations where these scenarios might occur can further aid in providing better patient care.
Pre-scan workflow: what great CBCT support looks like before the patient sits down
A smooth scan starts before the patient enters the room. A short readiness routine prevents most avoidable retakes.
Room and equipment readiness checklist
Follow your office protocol, but many pre-scan routines include:
- Power up the unit and confirm the system is ready
- Log into the imaging software with the correct user profile
- Confirm calibration and checks as required by your equipment or policy
- Place infection control barriers on touchpoints per protocol
- Confirm lead apron and thyroid collar availability if your office uses them for CBCT
- Ensure the area is clean, clear, and patient-safe
Verify patient identity and order details
Before you scan, verify:
- Patient identity using your office standard
- The provider request or imaging order
- The scan purpose and needed anatomy (single quadrant, arch, both arches, airway, localized area)
- Timing expectations (same-day decision-making vs. scheduled planning)
A quick clarification with the provider can save an entire rescan. If you are unsure which region is needed, do not guess.
Consent and expectations
Patients cooperate better when they understand what is happening. Your goal is calm, clear reassurance:
- How long it takes
- What they will hear (motor movement, brief scan noise depending on unit)
- The importance of staying still
- How you will coach them through it
Common patient questions you should be ready for:
- “Is it going to hurt?” (No, it should not hurt.)
- “How long do I have to stay still?” (Usually under a minute, depending on protocol.)
- “Why do I need this?” (Tie to the provider’s purpose without interpreting or diagnosing.)
For more information on common patient questions regarding CBCT scans, visit Broward Dental Academy’s FAQ section.
Remove artifacts
Artifacts are one of the fastest ways to ruin a scan. Confirm removal of:
- Glasses
- Earrings and facial piercings as applicable
- Necklaces
- Removable appliances, retainers, partials, dentures
- Hair pins or metallic accessories near the area
Digital documentation setup
Before you scan, set yourself up to document fast:
- Open the correct patient chart and encounter
- Create or open your imaging task or note template
- Confirm folder location and naming conventions
- Ensure the scan will be attached to the correct visit and provider

Radiation safety and compliance: assistant responsibilities without the jargon
Radiation safety is not about memorizing jargon. It is about consistent habits that reduce exposure and protect the patient, the team, and the practice.
ALARA and ALADA in practical terms
In daily workflow, these principles translate to:
- Use the smallest field of view that still meets the diagnostic need
- Get positioning right the first time to avoid retakes
- Confirm settings before exposure, not after
Pregnancy screening and documentation
Follow your office protocol for pregnancy screening. The key assistant responsibility is to:
- Ask the required questions in a professional, private manner
- Document the patient’s response clearly in the chart
- Escalate to the provider when the protocol requires it
PPE, shielding, and operator safety
Depending on local regulations and office policy:
- Use lead apron and thyroid collar when directed by your protocol
- Ensure the operator steps behind a protective barrier or maintains appropriate distance during exposure
- Keep unnecessary people out of the area
Time-saving habit: confirm settings before exposure
Many retakes happen because the scan protocol was correct for the machine but wrong for the clinical need. Before exposure, do a quick mental check:
- Is the requested anatomy covered?
- Is the FOV correct?
- Is the patient positioned and stable?
- Have artifacts been removed?
Know your lane
In most settings, assistants support image capture, verification, documentation, and communication. Ordering and interpretation are within the dentist’s scope. Staying compliant often comes down to two things: do not overstep diagnostic language and document your workflow clearly.
Step-by-step CBCT positioning workflow (the part that prevents retakes)
Positioning is where great assistants separate themselves quickly. The goal is a scan that captures the right anatomy with minimal motion and minimal artifacts.
1) Choose the correct scan protocol
Select a protocol based on the provider request:
- Limited FOV when you only need a specific region
- Quadrant or arch for broader surgical or restorative planning
- Airway or larger volume only when clinically requested and appropriate in your practice
When in doubt, confirm with the provider before you position the patient.
2) Patient positioning essentials
Your positioning checklist should include:
- Patient posture upright and stable, not slumped
- Feet placed evenly for balance when standing units are used
- Chin and forehead supports properly adjusted
- Bite stick use as directed, centered and comfortable
- Mid-sagittal alignment straight, not rotated
- Occlusal plane aligned to the unit’s guide (varies by machine)
Coach the patient with simple directions:
- “Bite gently and stay relaxed.”
- “Keep your tongue resting normally and do not swallow during the scan.”
- “Look straight ahead and hold still like a statue.”
3) Common positioning errors and quick fixes
- Head tilt or rotation: Re-align midline, re-check forehead support, confirm the patient is looking straight.
- Slumped posture: Ask the patient to stand tall, shoulders back, and keep weight evenly distributed.
- Biting off-center: Re-seat the bite stick and confirm the midline.
- Tongue shadow: Coach tongue position if your provider wants a specific instruction. If your machine and protocol require tongue placement, explain it clearly before the scan.
- Motion blur: Confirm comfort, confirm stability, confirm the patient understands the “do not move” moment.
4) Special situations
- Pediatric or anxious patients: Use gentle coaching, demonstrate the movement first, and keep your language calm and confident.
- Limited opening or TMJ discomfort: Adjust bite stick approach per equipment options and provider preference; never force positioning.
- Wheelchair patients: If your unit supports it, use accessible positioning. If not, coordinate alternative imaging or safe transfer per office protocol.
5) Final pre-exposure verification
Before you press the button, pause for five seconds:
- Artifacts cleared
- Alignment confirmed
- Patient comfortable and ready
- Settings confirmed
- Safety distance and barrier plan in place
Acquisition and immediate quality check: what to verify before the patient leaves
A fast quality check prevents the worst-case scenario: the patient leaves, the dentist opens the scan later, and it is unusable.
Run the scan safely
Follow office protocol for exposure and operator safety. Make sure the patient remains still and that no one enters the area mid-scan.
Immediate image review checklist (within the assistant role)
Without interpreting clinically, you can verify technical adequacy:
- Intended anatomy is included
- No obvious motion blur
- No major metal artifacts that obscure the region (you can refer to this guide on X-ray artifacts for more information)
- No truncation or cropping that removes the diagnostic region
- The scan orientation looks consistent with your protocol
When to rescan vs. when to escalate
Rescans should be driven by need and policy. Escalate to the provider when:
- The wrong anatomy was captured
- The diagnostic region is missing
- You are unsure if the scan meets the purpose
If your office protocol allows the assistant to reattempt a scan for a clear technical error, do so with a calm approach.
If a rescan is needed
- Explain briefly and confidently what you need from the patient
- Re-check artifacts and posture
- Adjust positioning based on the issue you saw
- Keep the patient calm so they cooperate better the second time
Document completion and issues
In the patient record, document:
- Scan completed
- Protocol or type per office naming standard
- Any patient challenges (movement, anxiety, limited opening)
- Any retake and the reason in simple, factual language
Digital workflow after CBCT: exporting, labeling, storing, and sharing the right way
The scan is only as useful as your ability to make it easy for the provider to find, review, and share.
File organization that saves everyone time
Use consistent naming conventions. A practical format many offices use is:
- Date
- Scan type (limited, quadrant, full)
- Region (UR, UL, LR, LL, maxilla, mandible, airway)
- Notes if needed (motion retake, second attempt)
Whatever your office standard is, follow it exactly. Consistency beats creativity.
Attach and route inside the practice system
- Link the CBCT to the correct encounter
- Route or assign the task to the provider for review
- Add a brief note that flags anything relevant (example: “Patient moved slightly first attempt, second scan completed and appears clear.”)
Secure sharing workflow
When exporting DICOM or sharing with specialists:
- Use HIPAA-aware transfer methods approved by your office
- Avoid unencrypted email
- Avoid loose USB handling unless it is explicitly approved and secured per protocol
- Confirm access controls, passwords, and recipient information before sending
Backup and retention habits
Assistants are not always responsible for IT decisions, but you should know the office policy for:
- Where images are stored (local server, cloud, vendor platform)
- Who can access them
- How long they are retained
- What steps to follow if an export fails or a study is missing
Close the communication loop
Do not assume the provider will “see it.” Send a clear message in your system:
- Images ready
- Where they are stored in the chart
- Any scan challenges noted
- Any specialist packaging completed if applicable
Supporting the provider: how assistants help turn CBCT data into a smooth clinical day
The best CBCT support is proactive. You are helping the provider interpret efficiently, communicate confidently, and keep the schedule on time.
Prep for interpretation
- Confirm the requested region is captured
- Pull relevant prior imaging (PAs, pano) for comparison
- Ensure the correct study opens quickly without searching
Chairside support during consults
Depending on provider preference and your training:
- Pull up common views and slices quickly as directed
- Toggle views, density, and orientation tools the provider uses regularly
- Capture screenshots for documentation if your office does this
- Keep your language non-diagnostic while assisting
Treatment coordination
After the provider consult:
- Document the next steps accurately (referral, additional records, surgical guide planning, treatment sequencing)
- Assign tasks to team members as your system allows (records request, finance follow-up, scheduling blocks)
Referral workflow
When sending to a specialist, packages commonly include:
- DICOM export
- A brief clinical note and reason for referral
- Any relevant 2D imaging and photos
- A report request if the specialist or radiology service requires it
Confirm the specialist’s requirements and timeline so the patient does not get stuck waiting.
Patient communication support
Assistants often reinforce instructions and scheduling, without overstepping diagnosis:
- Confirm next appointment steps
- Provide clear pre-op or record collection instructions per provider direction
- Support financing and scheduling flow by communicating what the patient needs next
Common bottlenecks (and how top assistants prevent them)
Bottleneck: wrong FOV or wrong anatomy captured
Prevention:
- Confirm the order
- Use preset protocols your office has standardized
- Do a quick verbal confirmation with the provider when unsure
Bottleneck: motion artifacts and retakes
Prevention:
- Prioritize patient comfort and stability
- Coach clearly and calmly
- Re-check posture and supports before exposure
Bottleneck: file chaos
Prevention:
- Use templates and naming rules
- Store scans in the same location every time
- Attach scans to the correct encounter immediately
Bottleneck: delays in provider review
Prevention:
- Send a clear handoff message
- Route tasks in software consistently
- Use standardized notes that make key details easy to see
Bottleneck: compliance gaps
Prevention:
- Document pregnancy screening per protocol
- Document consent and patient communication
- Use secure sharing methods only
Skills that make an assistant stand out in CBCT plus digital dentistry
CBCT support is a blend of technical skill, digital accuracy, and patient management.
- Technical confidence: positioning accuracy, protocol familiarity, basic troubleshooting, knowing when to escalate
- Digital confidence: charting, routing tasks, exporting correctly, consistent documentation habits
- Patient management: calm coaching, anxiety support, professionalism during retakes
- Team communication: concise handoffs, anticipating provider needs, protecting the schedule
- Career mobility: CBCT and digital workflow competence can support expanded functions and advancement in modern practices
These are the skills practices look for when they say they want a team member who is “thoroughly trained, legally compliant, and clinically confident.”
How Broward Dental Academy prepares assistants for CBCT imaging support and digital workflows
As CBCT adoption grows, more practices expect assistants to be comfortable with advanced imaging support and the digital workflow that follows. They want professionals who are not only helpful chairside but also accurate in documentation, consistent in compliance, and confident with modern systems.
Broward Dental Academy is built around that reality. The training approach focuses on immediate immersion in online and clinical settings, modern eLearning lesson plans for remote training, and in-office internships that help students perform in real practice environments.
The goal is not just to pass an exam. It is to prepare students to think critically, act ethically, and perform confidently in a high-performance dental practice. With 7 courses available and flexible financing, the programs are designed to be practical for working students who want stable income, flexible schedules, and long-term career mobility in one of the fastest-growing healthcare industries.
For assistants aiming to work in modern tech-forward offices, the next step is Advanced Dental Assistant Training – Level 02. Additionally, Broward Dental Academy offers a comprehensive Dental Assistant Level 01 course, which lays the foundational skills required for success in this field. For those looking to further specialize after Level 02, the Dental Assistant Hygienists Level 03 course provides an excellent opportunity for advanced learning.
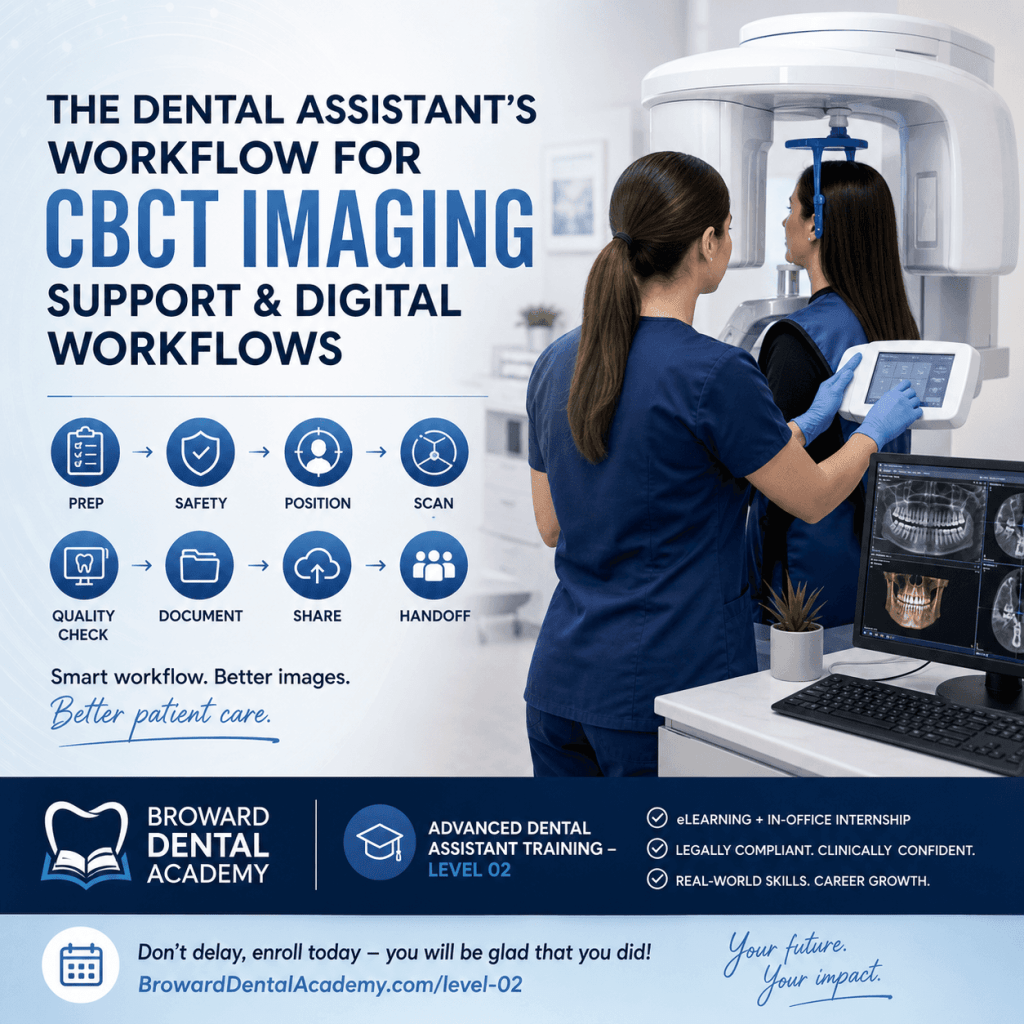
Wrap-up: a simple CBCT plus digital checklist assistants can follow on every scan
If you want a quick workflow you can repeat every time, remember:
Prep → Safety → Position → Scan → Quality check → Document → Share → Handoff
The payoff is real: fewer retakes, better patient experience, smoother consults, and stronger trust from the provider and the team.
If you are ready to train for real-world, modern practice expectations, explore Advanced Dental Assistant Training – Level 02 at Broward Dental Academy:
https://browarddentalacademy.com/advanced-dental-assistant-training-level-2/
Don’t delay, enroll today – you will be glad that you did!
FAQs (Frequently Asked Questions)
What is Cone Beam Computed Tomography (CBCT) and why is it important in modern dentistry?
Cone Beam Computed Tomography (CBCT) is a 3D dental imaging technology that provides volumetric data, allowing dentists to view anatomy in slices, views, and reconstructions. It offers detailed visualization beyond traditional 2D X-rays, making it essential for implant planning, endodontic assessment, oral surgery, trauma evaluation, and airway or TMJ screening.
How does the dental assistant’s role contribute to an effective CBCT digital workflow?
Dental assistants play a central role in supporting the digital diagnosis workflow by following a consistent process: Capture → Verify → Document → Communicate. This approach reduces retakes, streamlines appointment flow, minimizes chair time lost to troubleshooting, and enhances patient comfort and confidence during CBCT imaging.
In what common patient scenarios is CBCT typically used within the dental practice?
CBCT is commonly employed for implant consultations and pre-operative planning, impacted teeth evaluation (such as third molars and canines), trauma cases involving suspected bone damage, complex endodontic assessments needing 3D evaluation, pathology evaluations when 2D imaging is insufficient, and pre-surgical planning for extractions or grafting procedures.
What are the key communication points dental assistants should confirm before performing a CBCT scan?
Assistants should confirm the reason for the scan in clear terms, document symptoms and relevant patient history related to imaging (like pain location or prior surgeries), and capture any patient concerns such as anxiety, claustrophobia, pregnancy status, TMJ discomfort, or limited mouth opening. Clear communication ensures proper scan timing and protocol adherence.
What steps are involved in the pre-scan workflow to ensure successful CBCT imaging?
Pre-scan preparation includes powering up the CBCT unit and confirming system readiness; logging into imaging software with correct user profiles; calibrating equipment per protocol; applying infection control barriers; ensuring availability of lead aprons and thyroid collars if used; maintaining a clean and safe scanning area; verifying patient identity; confirming provider requests; clarifying scan purpose and targeted anatomy; and understanding timing expectations.
Why do many dental practices prefer starting with 2D imaging before moving to CBCT scans?
Many practices adopt a principle of ‘right scan, right time,’ beginning with 2D imaging like PA, bitewing, or panoramic X-rays to minimize radiation exposure. They escalate to CBCT only when its benefits outweigh additional exposure risks—such as for implant planning or high-risk extractions—to improve diagnostic accuracy without unnecessary radiation.