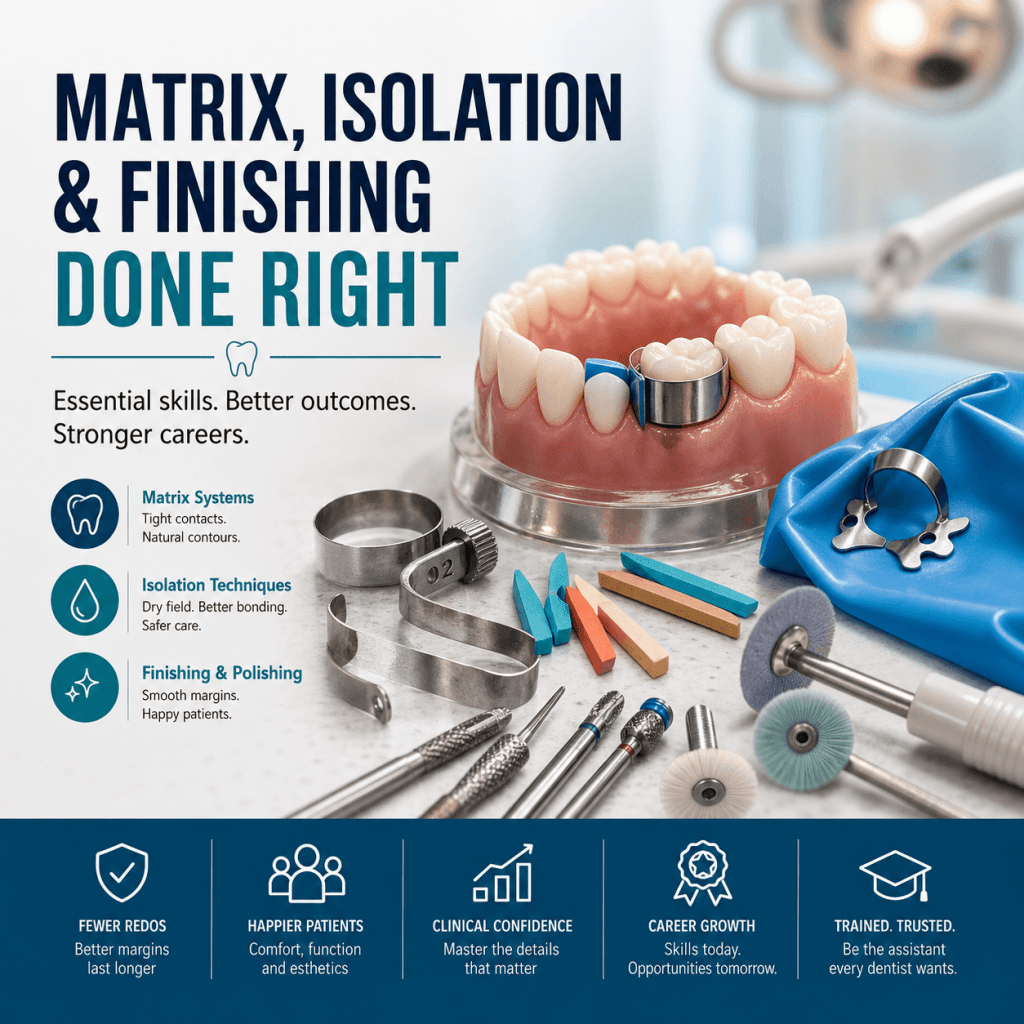
Why matrix, isolation, and finishing skills matter for today’s dental assistants
Great restorative dentistry is not just about placing composite. It is about rebuilding anatomy that looks natural, feels comfortable, and stays sealed over time. For dental assistants, matrix systems, isolation, and finishing techniques are three practical skills that directly shape chairside outcomes: proper contours, sealed margins, fewer redo appointments, and happier patients.
In busy practices, these skills also support expanded functions workflows, especially for posterior composites where moisture control, proximal contact, and occlusal adjustment can make or break the result. Even when the dentist or EFDA is doing the restoration, the assistant’s support is often the difference between a smooth appointment and one filled with interruptions.
Your role typically includes preparing the setup with the right matrix systems from Broward Dental Academy, anticipating the next step, maintaining field control with effective isolation techniques like rubber dam basics or alternatives from our oral surgery section, passing instruments in sequence, and following office protocols to keep the procedure efficient and clinically sound.
In this guide, you will learn:
- What matrix systems do and why small setup errors cause big problems
- The main matrix types, plus wedges and how to troubleshoot common issues
- Everyday isolation techniques
- Finishing and polishing fundamentals that elevate comfort, longevity, and esthetics
- How all three areas connect into one reliable workflow
- How training can translate into career growth including tracks in orthodontics or endodontics

Moreover, understanding these skills can also lead to a deeper comprehension of related fields such as robotics in dentistry, which is an emerging area that combines technology with traditional dental practices for improved outcomes.
Matrix systems: what they do (and what goes wrong when they’re off)
A matrix system is a temporary wall that helps rebuild a missing tooth surface, most commonly the proximal wall between teeth. It supports proper contour, emergence profile, and contact while the restorative material is placed and cured.
When the matrix is not adapted or stabilized correctly, a few predictable problems show up:
- Open contact leading to food impaction and patient frustration
- Overhangs that trap plaque and irritate gingiva, potentially leading to issues requiring periodontics
- Ledges and poor emergence profile that feel “bulky” and are hard to clean
- Gingival irritation or bleeding caused by poor fit or tissue trauma
- Marginal leakage risk when the gingival margin is not sealed during placement
Matrix use is not limited to posterior Class II composites. Anterior interproximal restorations rely on matrices too, often clear strips, because contour and polish must mimic natural anatomy.
Matrix systems also matter in core buildups and some temporary restorations, where stabilizing walls helps achieve proper form and supports subsequent steps.
There are cases where a matrix may be unnecessary, such as small occlusal-only restorations, depending on the tooth, prep design, and material. When in doubt, follow the dentist’s protocol and be ready with options.
Common restorative scenarios that require a matrix
- Class II posterior restorations (MO/DO/MOD): contact, marginal ridge height, and a sealed gingival margin are primary goals.
- Class III anterior interproximal restorations: contour and polish must blend seamlessly with natural tooth form.
- Core buildups and temporary restorations: matrices help create stable walls and correct form.
- Some occlusal-only restorations: may not need a matrix, but case selection varies by provider and material.
For further understanding of these procedures or if you have any specific questions regarding them, you might find the frequently asked questions section helpful. Additionally, if you’re interested in pursuing a career in dentistry or enhancing your skills through specialized training, consider exploring our certification programs. We also have multiple locations for your convenience.
Types of matrix systems dental assistants should know
Dental assistants should be familiar with major matrix categories and why a dentist may choose one over another:
- Circumferential vs sectional
- Metal vs clear
- Anterior vs posterior
The “right system” depends on the tooth, the preparation, and the restorative material. Composite in a deep proximal box with a subgingival margin can demand different band stiffness and wedge selection than a shallow box with easy access. Practice style also matters. Many dentists have strong preferences, and assistants who can confidently set up multiple systems are valuable immediately.

Circumferential (Tofflemire-style) matrix: dependable and versatile
A circumferential matrix is a classic system commonly used for posterior restorations. It typically includes:
- Retainer
- Matrix band
- Burnisher (for contouring and adaptation)
Typical use: posterior restorations where a full band around the tooth provides stability, especially in broader preps or when the provider prefers a traditional setup.
Assistant setup checklist
- Select the correct band size and thickness per office preference.
- Confirm band orientation so the contour aligns properly with the tooth.
- Verify the tightening direction and that the retainer will not interfere with access.
- Ensure occlusal clearance for wedge placement and instrumentation.
Common pitfalls to watch
- Band is too loose, leading to overhangs and poor contact.
- Band height is incorrect (too tall causes occlusal interference, too short risks margin exposure).
- Gingival margin is not sealed, inviting overhang or flash.
- Band crumples or folds during placement or packing.
How assistants can help in real time
- Pre-burnish the band when appropriate to support contour.
- Have wedges staged and ready in multiple sizes.
- Pass instruments in sequence so the operator can place, adapt, and verify quickly.
Sectional matrix systems: best for tight contacts (when set correctly)
Sectional matrices are widely used for Class II composites because they often create better proximal contacts when properly placed. Core components include:
- Sectional band
- Wedge
- Separation ring
The ring provides slight tooth separation so that when the band is removed, the teeth rebound into a tighter contact.
Assistant setup flow (common approach)
- Select the sectional band with appropriate curvature and height.
- Place the wedge first in many cases to seal the gingival margin and stabilize the band.
- Seat the band, confirm adaptation, then place the ring.
- Confirm stability before curing. The band should not rock, lift, or collapse.
What to monitor
- Ring tines should be placed on enamel, not on soft tissue.
- Band should be adapted at the gingival margin without gaps.
- Contact area alignment should match the adjacent tooth anatomy.
Troubleshooting
- Rocking band: reassess wedge size, band contour, and whether the ring is fully seated.
- Bleeding at gingival margin: gentle retraction, improve adaptation, and alert the dentist immediately before bonding.
- Band collapse during packing: confirm ring placement and consider a stiffer band if the prep is wide or deep.
Clear (mylar) strips and anterior matrices: contour and finish start here
For anterior interproximal composites, clear matrices are often preferred because they allow light curing through the strip and help create a smoother initial surface.
When to use
- Class III anterior restorations
- Small anterior restorations involving proximal surfaces
- Diastema closure support (case-dependent)
Assistant technique support
- Maintain proper strip tension to shape the restoration and reduce voids.
- Use wedges as needed to control the gingival margin and prevent overhang.
- Avoid wrinkles and folds, which can create surface defects and require aggressive finishing.
How clear matrices affect finishing A well-adapted mylar strip often produces a smoother surface at the margin, meaning less aggressive finishing is needed. That protects anatomy and reduces heat and aerosol.
Wedges: small tool, huge impact
Wedges are easy to overlook, but they are one of the most important tools for margin quality in proximal restorations.
Primary purposes
- Seal the gingival margin
- Slightly separate teeth to help achieve contact
- Protect papilla and soft tissue
- Reduce the risk of overhangs and flash
Wood vs plastic wedges
- Wood wedges: can compress and adapt well, often helpful for tight gingival adaptation.
- Plastic wedges: may be easier to place and can be more consistent in shape. Some are translucent for curing access.
Selection and placement tips
- Choose size and shape based on embrasure space and margin depth.
- Place from lingual or buccal depending on access and contour needs.
- Be ready for a second wedge or stacking when the margin is deep or the band is not fully sealed.
Signs of correct placement
- Band is sealed at the gingival margin.
- Minimal tissue trauma and manageable pressure.
- Stable matrix with reduced rocking.
Isolation techniques dental assistants rely on every day
Isolation means controlling moisture, blood, saliva, and soft tissue so the operator can bond and place restorative material predictably.
This matters because adhesive dentistry is moisture-sensitive. Contamination during etch, bonding, or placement can lead to:
- Post-operative sensitivity
- Marginal leakage
- Staining at margins
- Premature restoration failure
In many offices, isolation is largely the assistant’s responsibility. You help maintain a dry field, protect the airway, improve visibility, and keep the patient comfortable. Strong isolation also improves speed because it reduces stop-and-start interruptions during critical steps.
Rubber dam isolation: gold standard for many restorative procedures
A rubber dam provides superior moisture control, soft tissue retraction, and patient safety by reducing aspiration risk.
Basic components to know
- Dam sheet
- Frame
- Punch
- Clamps
- Floss ties
- Lubricant
Chairside sequence (typical)
- Punch the holes per tooth selection.
- Place clamp (often with floss tied for safety).
- Seat the dam and stabilize on the frame.
- Invert edges for a better seal.
- Confirm seal and patient comfort before bonding begins.
Common challenges and how assistants help
- Clamp stability: have alternate clamp sizes ready, confirm seating, and assist with retraction.
- Gag reflex: coach breathing, adjust positioning, and work efficiently.
- Tight contacts: assist with flossing the dam through carefully to avoid tearing.
- Cervical leakage: help with inversion, suction control, and prompt communication if seepage appears.
Alternative isolation: high-volume suction, retraction, and isolation devices
Not every restorative appointment uses a rubber dam. Assistants should be excellent with alternative isolation methods, while also recognizing when they are not enough.
HVE and saliva ejector
- Use angles that capture fluid without pulling tissue.
- Avoid placing suction directly on mucosa for long periods to reduce trauma.
Cheek and tongue retractors, bite blocks
- Improve access and visibility.
- Reduce patient fatigue and help the operator maintain consistent working distance.
Device-based isolation systems Some practices use isolation devices that combine retraction and suction. Monitor:
- Seal and placement stability
- Patient comfort
- Suction effectiveness during etch, bond, and curing
When alternatives are not enough
- Persistent pooling near the working area
- Recurrent contamination during bonding steps
- Uncontrolled bleeding near a subgingival margin
- When you see these signs, communicate quickly so the team can switch to a rubber dam or modify the plan.
Cotton rolls, dry angles, and gingival management
Cotton roll isolation is common, but it requires constant attention.
Strategic placement
- Control salivary flow near the parotid duct area.
- Support lingual isolation in the floor of the mouth.
- Adjust placement by quadrant and whether the restoration is anterior or posterior.
Dry angles Dry angles are especially useful for maxillary posterior saliva control. Replace them promptly when saturated because “almost dry” is not dry enough for bonding.
Gingival bleeding control basics
- Gentle tissue handling during matrix and wedge placement
- Retraction when needed
- The dentist may use hemostatic agents when appropriate
For more comprehensive insights into managing such scenarios effectively, it’s worth exploring this detailed study which provides valuable information on various aspects of dental procedures including moisture control and gingival management.
Assistant focus
- Keep visibility clear
- Communicate contamination immediately
- Replace saturated materials fast and proactively
Finishing and polishing: where “good enough” becomes clinically excellent
Finishing shapes anatomy and margins. Polishing smooths surfaces to reduce plaque retention, staining, and patient discomfort. Together, they influence longevity, gingival health, and esthetics.
The assistant’s role includes instrument setup, sequence readiness, irrigation and suction, and making sure occlusion-check materials are ready when the dentist asks. Safety matters here too: heat control, soft tissue protection, eye protection, and aerosol management should be consistent.
Finishing goals: anatomy, margins, and contacts
Anatomy basics
- Marginal ridge height that matches the adjacent tooth
- Occlusal grooves and cusp anatomy that feel natural
- Embrasures and emergence profile that support cleansability
Margins
- Smooth transition from tooth to restoration
- Remove flash and overhangs without ditching or gouging
Contacts and interproximal shaping
- Protect adjacent enamel
- Use finishing strips where appropriate for interproximal refinement
How assistants can help
- Pass instruments in the correct order without delays
- Maintain dryness and visibility while finishing
- Support floss checks and communicate if floss shreds or catches
Common finishing and polishing armamentarium (and what each is for)
- Finishing burs (carbide or diamond): gross reduction and contouring, then fine refinement as you switch to finer grits.
- Discs, cups, and points: contouring facial and lingual surfaces, smoothing line angles, and creating a uniform surface.
- Interproximal strips: safe shaping and smoothing between teeth while protecting adjacent enamel.
- Polishing systems: multi-step systems often deliver a more consistent gloss; one-step systems may be faster for certain cases. High gloss helps reduce plaque retention and staining.
- Adjuncts: articulating paper, shimstock, floss, and sometimes wedges for protection during finishing near the gingiva or interproximal area.
A practical finishing sequence assistants should be ready to support
While the exact sequence varies by provider, a reliable flow often looks like this:
- Matrix removal timing (case-dependent): assist with safe removal and ensure soft tissue is not pinched.
- After curing: remove wedge, band, and ring, then suction and rinse as needed.
- Inspect margins: look for flash and overhang areas that need attention.
- Adjust occlusion: check centric contacts first, then excursions. Have articulating paper and shimstock ready.
- Refine anatomy: use appropriate finishing burs and discs in a logical grit sequence.
- Polish to final luster: complete the polishing system without skipping steps when the system requires it.
- Final checks: floss pass, patient comfort, and quick review of post-op expectations.
For post-op instructions, many offices reinforce that mild sensitivity can occur, and patients should follow any chewing or hard-food recommendations given by the dentist.
How matrix, isolation, and finishing work together in one smooth workflow
These skills operate as a chain reaction:
- Isolation protects bonding, which protects the seal.
- The matrix and wedge create contour, emergence, and contact.
- Finishing and polishing perfect margins, comfort, and cleansability.
A smooth workflow depends on timing and handoffs. When assistants anticipate the next step, the operator spends less time waiting and more time placing with control.
Adopt a quality-control mindset with quick checks at each stage. Catching a band lift at the gingival margin early is far easier than discovering an overhang at the end.
Helpful, concise callouts include:
- “Contamination on distal.”
- “Band lift at gingival.”
- “Ring on tissue.”
- “Open contact risk.”
Mistakes to avoid (and what to do instead)
Matrix-related
- Loose band: retighten, burnish, reassess wedge size.
- Wrong band height: switch bands before packing or curing.
- Wedge not sealing: change wedge size, adjust angle, consider stacking.
- Ring placed incorrectly: reposition onto enamel and confirm stability.
Isolation-related
- Poor suction position: adjust angle and distance to capture pooling without tissue trauma.
- Cotton rolls left too long: replace early and often.
- Missed contamination during bonding: speak up immediately so the step can be corrected.
Finishing-related
- Over-reducing anatomy: refine conservatively and verify occlusion repeatedly.
- Overheating composite: use light pressure, intermittent contact, and proper suction.
- Skipping grits or steps: follow the polishing system as designed.
- Ignoring floss and occlusion checks: build these into every restoration finish.
Patient comfort
- Tissue pinched by matrix or ring: pause, reposition, and reassure.
- Clamp discomfort: communicate quickly and assist with adjustments.
- Fatigue: use bite blocks and retraction to improve comfort and access.
Why these skills are a career accelerator for dental assistants (especially EFDA track)
Dental practices want assistants who are fast, accurate, and dependable under pressure. When you can set up matrices correctly, maintain isolation without constant reminders, and support finishing sequences smoothly, you become the assistant providers trust for restorative dentistry.
These competencies are also foundational for expanded functions readiness, with duties and legal scope varying by state. The stronger your technique basics are, the more confidently you can step into advanced restorative assisting under proper supervision and compliance.
The dental industry continues to grow, offering stable income, flexible schedules, career mobility, and a respected role in healthcare. As demand rises, practices increasingly look for professionals who are thoroughly trained, legally compliant, and clinically confident.
Training at Broward Dental Academy: turning technique into real chairside confidence
Broward Dental Academy offers a wide range of dental courses and advanced dental training designed to prepare students for modern, high-performance practices. The focus is not just passing an exam. It is learning to thrive in real clinical workflows with the confidence to support quality outcomes.
Students experience immediate immersion in online and clinical settings, supported by updated eLearning lesson plans for remote training. Programs also emphasize real-world readiness through in-office internships, critical thinking, ethical practice, and legal compliance.
With seven courses including Dental Assistant Level 01, Dental Assistant Level 02, and Dental Assistant Hygienists Level 03, along with flexible financing options, Broward Dental Academy helps students build practical skills that employers value.
If you want to move toward advanced restorative responsibilities, the next step for many students is the pillar program: Expanded Functions Dental Assistant – Level 03 (EFDA).
Next steps: build these skills and start moving up
If you want to improve quickly, start by evaluating your current strengths in three areas: matrix setup, isolation control, and finishing and polishing support.
A practical action plan:
- Observe how your dentist prefers each matrix system and practice setup speed.
- Learn multiple systems so you can adapt to different teeth and preps.
- Ask for feedback from clinical mentors after restorations, especially on contacts and margins.
- Build a habit of anticipating the next step so the procedure stays uninterrupted.
When you are ready to turn practice into confidence and career momentum, Broward Dental Academy can help you get there. Don’t delay, enroll today, you will be glad that you did.
FAQs (Frequently Asked Questions)
Why are matrix systems, isolation, and finishing skills essential for dental assistants in restorative dentistry?
Matrix systems, isolation, and finishing skills are crucial for dental assistants because they directly influence chairside outcomes such as proper tooth contours, sealed margins, reduced redo appointments, and increased patient satisfaction. These skills support expanded functions workflows, especially in posterior composites where moisture control and proximal contact are critical for successful restorations.
What problems can arise if a matrix system is not correctly adapted or stabilized during a dental restoration?
Improper adaptation or stabilization of matrix systems can lead to open contacts causing food impaction, overhangs that trap plaque and irritate gingiva potentially leading to periodontal issues, bulky ledges with poor emergence profiles that are hard to clean, gingival irritation or bleeding from tissue trauma, and marginal leakage risks when the gingival margin is not properly sealed during placement.
What types of restorative dental procedures typically require the use of matrix systems?
Matrix systems are commonly required in Class II posterior restorations (MO/DO/MOD) to achieve proper contact and marginal ridge height; Class III anterior interproximal restorations where contour and polish must mimic natural tooth anatomy; core buildups and temporary restorations that need stable walls for correct form; and some occlusal-only restorations depending on case specifics and provider preferences.
What are the main categories of matrix systems dental assistants should be familiar with?
Dental assistants should know about circumferential versus sectional matrices, metal versus clear matrices, and anterior versus posterior matrices. The selection depends on factors like tooth location, preparation depth, restorative material used, and dentist’s preferences. Mastery in setting up multiple matrix systems enhances an assistant’s value in clinical practice.
How do effective isolation techniques contribute to successful restorative dental procedures?
Effective isolation techniques like rubber dam application or alternatives maintain a dry field by controlling moisture during restorative procedures. This ensures optimal bonding of composite materials, prevents contamination that could compromise seal integrity, reduces procedure interruptions, and ultimately contributes to durable, comfortable restorations with improved esthetics.
How can training in matrix systems, isolation, and finishing skills benefit a dental assistant’s career growth?
Training in these practical skills not only improves clinical efficiency and patient outcomes but also opens pathways for career advancement into specialized tracks such as orthodontics or endodontics. Enhanced competence supports expanded functions workflows and positions dental assistants as indispensable team members capable of supporting complex restorative procedures.